With many students graduating, I have had questions about how long will my ArcGIS Online account live and how can I move my work to another so I can keep a portfolio. Most schools only keep accounts open for a semester or two after graduation, and others right after graduation. So your best bet is to set up a personal account and move anything of value you can. The process is now easy using the ArcGIS Online Assistant.
ArcGIS for Personal Use
When you lose access to ArcGIS Online from your institution, you will also lose your ArcGIS Pro and other desktop applications. ArcGIS is expensive for commercial user. If you are just practicing your skills or doing volunteer work, you can purchase an ArcGIS Online for Personal Use license https://www.esri.com/en-us/arcgis/products/arcgis-for-personal-use/buy which is a good option for keeping your portfolio work. This license is USD 100 a year and comes with most of the tools you were accustomed to while a student. One difference is you only have 100 credits for ArcGIS Online so be careful. An additional bonus is you can take and manage your Esri training so it can follow you along your career.
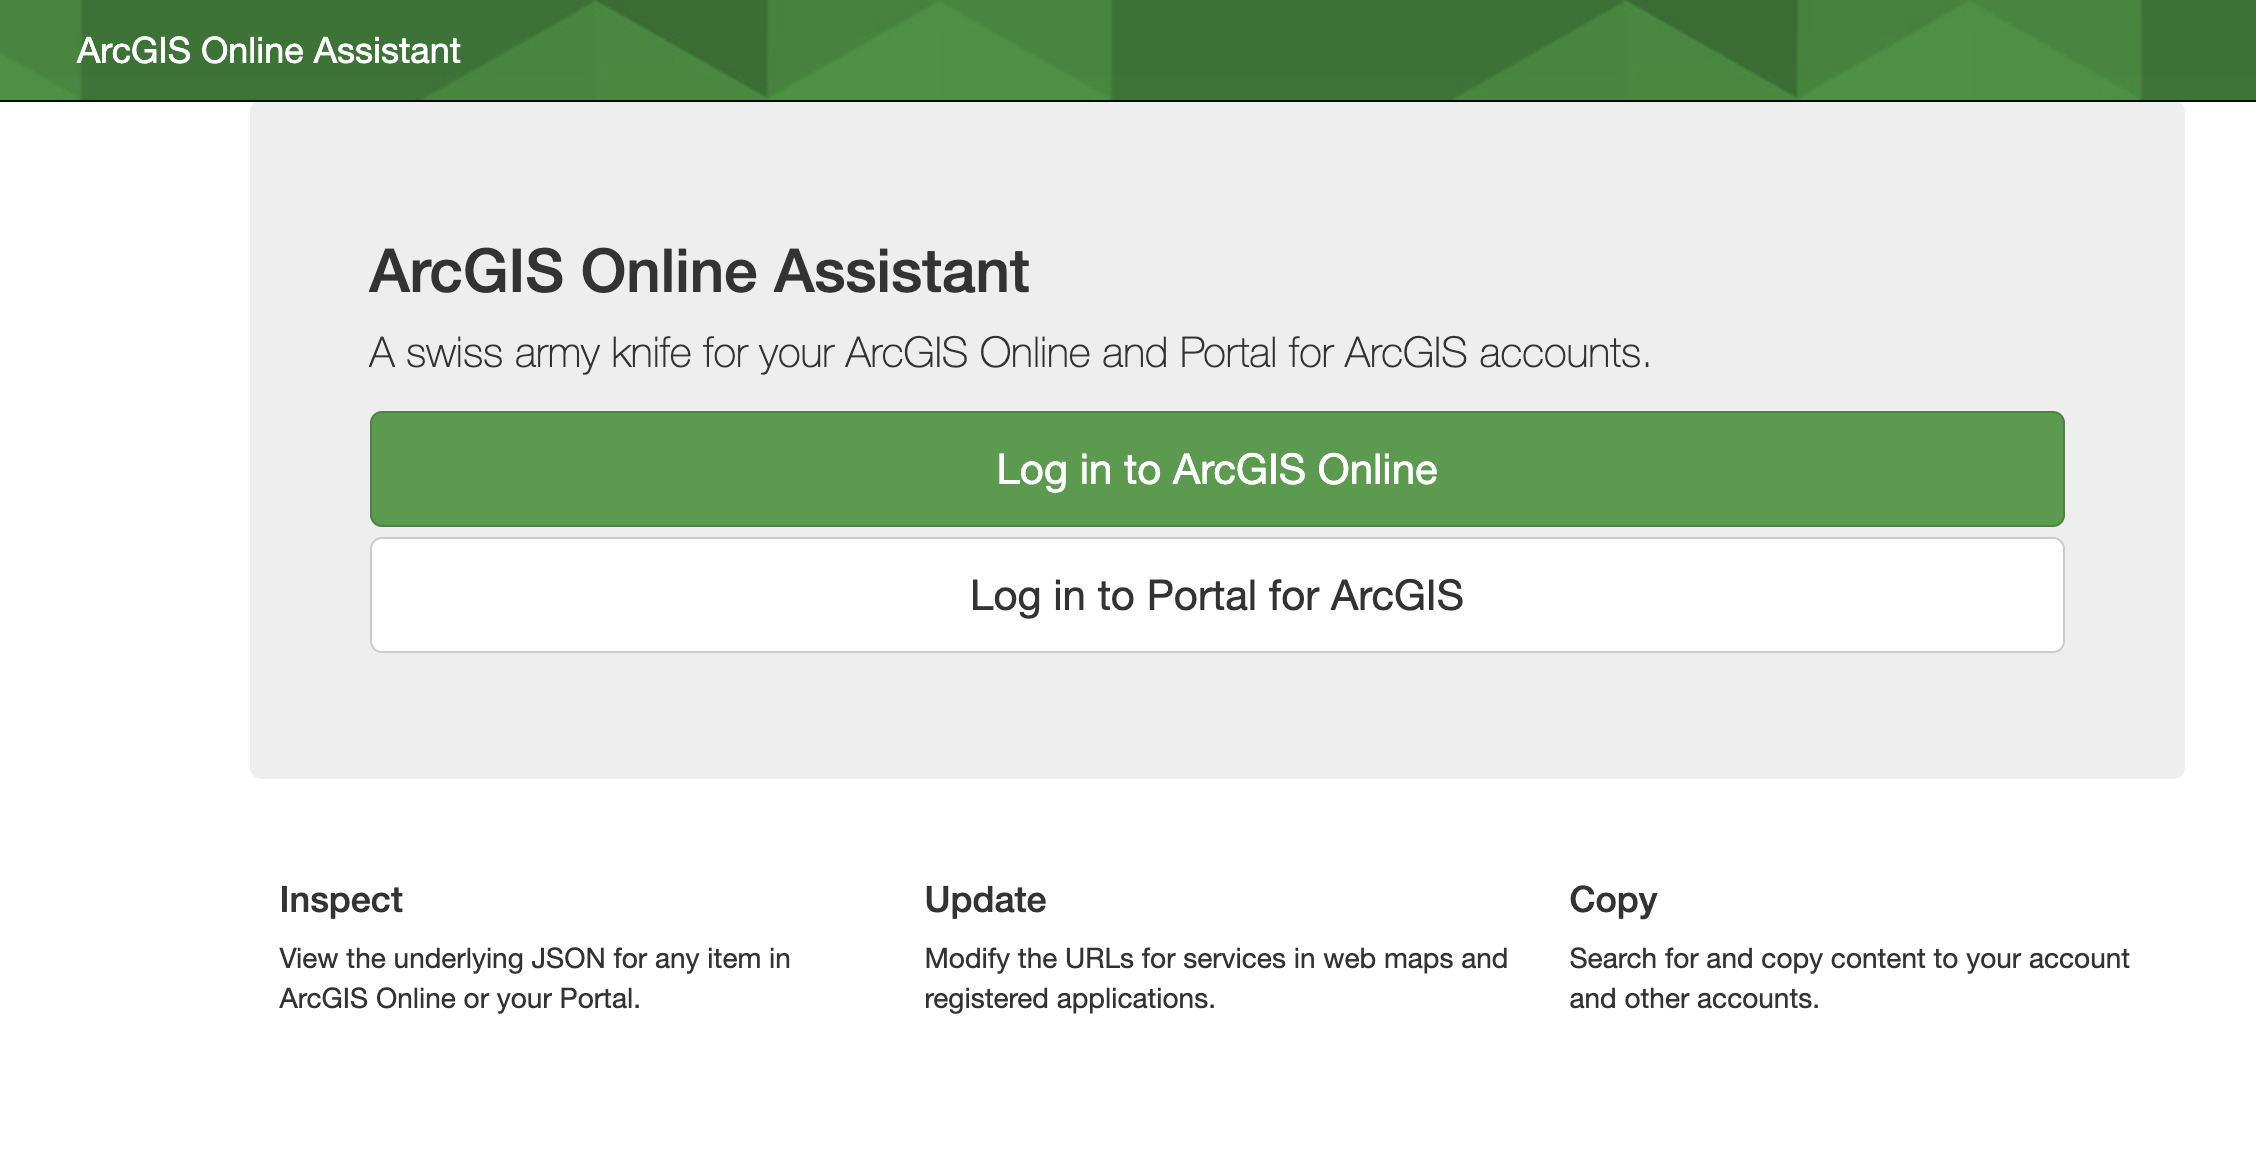
ArcGIS Online Assistant
Now you have your personal account. You can start the process of migrating your data. Currently, there is the production ArcGIS Online Assistant and a Beta version of the next one. I will start with the regular Online Assistant and then end this post with the instructions for the Beta site so depending on when you want to migrate your information hopefully you will find instructions that help. The production tool moves only some content and the beta can more more but being a beta there may be limitations.
The ArcGIS Online Assistant’s Website is https://ago-assistant.esri.com/
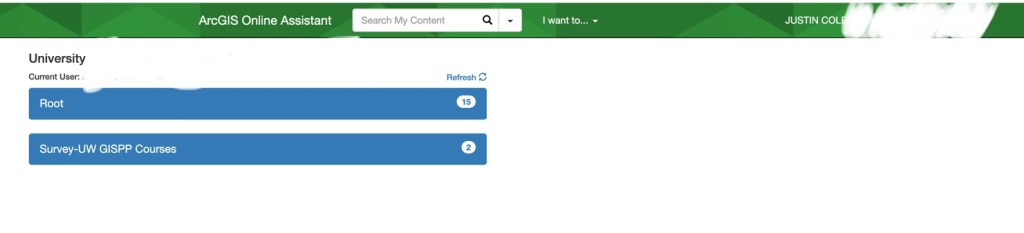
First login to your School account and you will see your content.
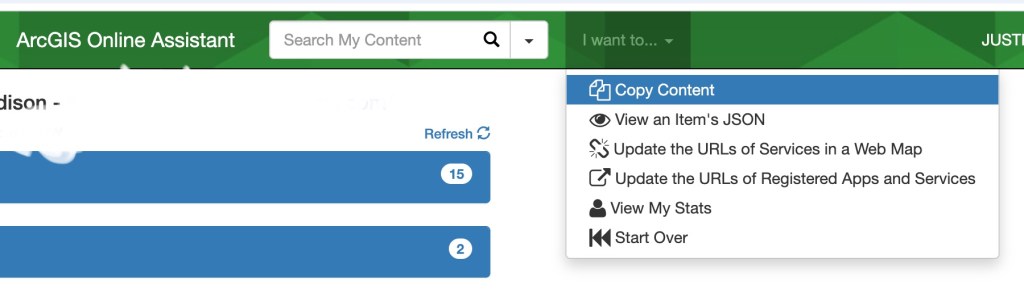
At the top click “I want to” and then you will see some basic options including the copy content. Here you can also do some administration of your existing site such as updating addresses or viewing stats. We are going to copy content.
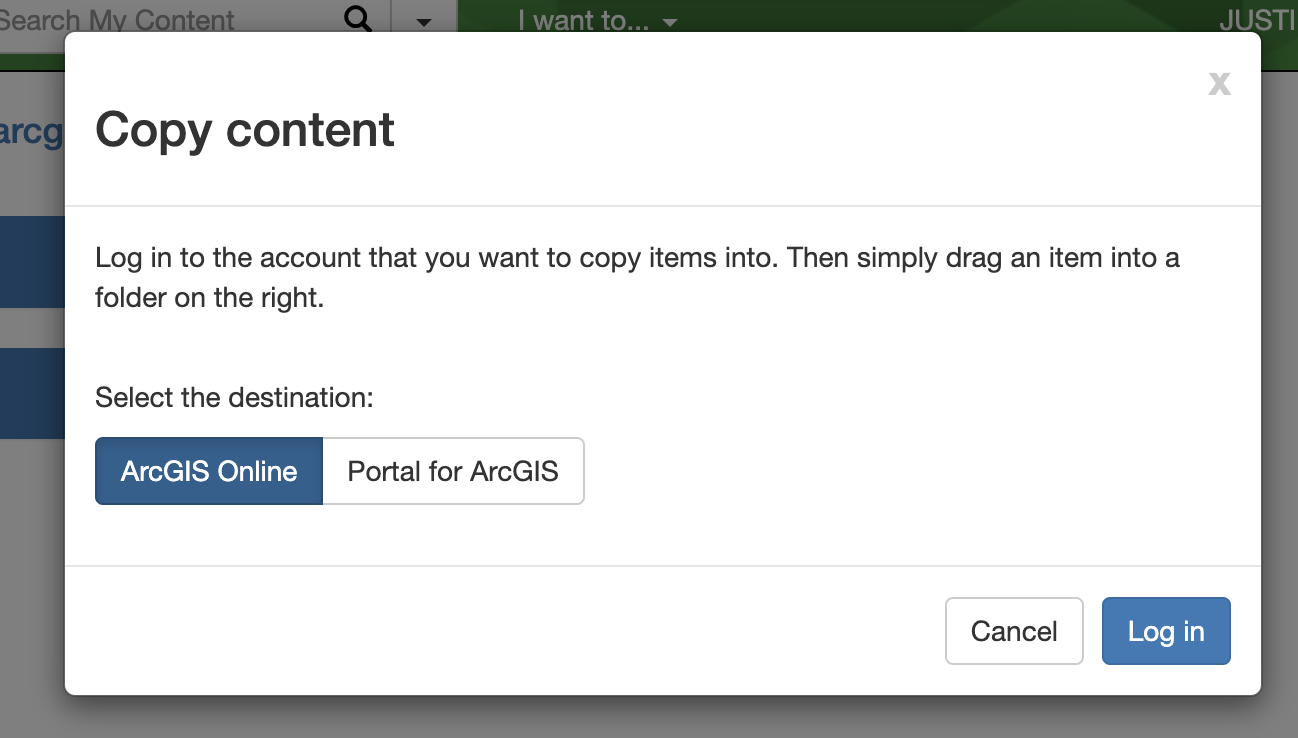
When you click Copy Content it will ask where you want to copy the data to. We are going to copy it to our new/personal account. So Click Another Account.

We will click ArcGIS Online for the Destination Account. The Portal for ArcGIS is a great option for organizations that set up their portal servers after only using ArcGIS Online and want to move the data locally.
I Clicking Log In will bring up the standard ArcGIS login page. Log in to your second account and then you will see your two accounts open. You can then drag what content you want between accounts. Webmaps may copy over easily. Feature Services do need a little more input from you.
A simple copy will call the information from your source. This would be a good option if you know the account will always be there for your needs, but since you are graduating and the account’s life is limited you will want to do a full copy.
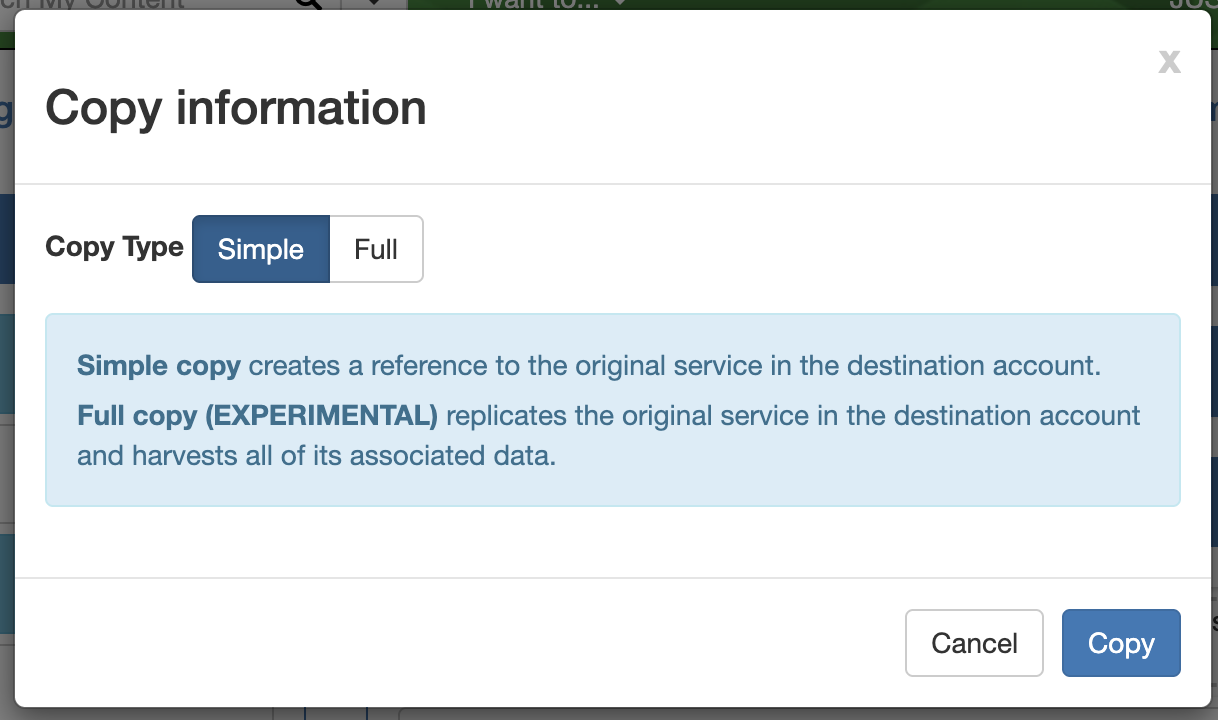
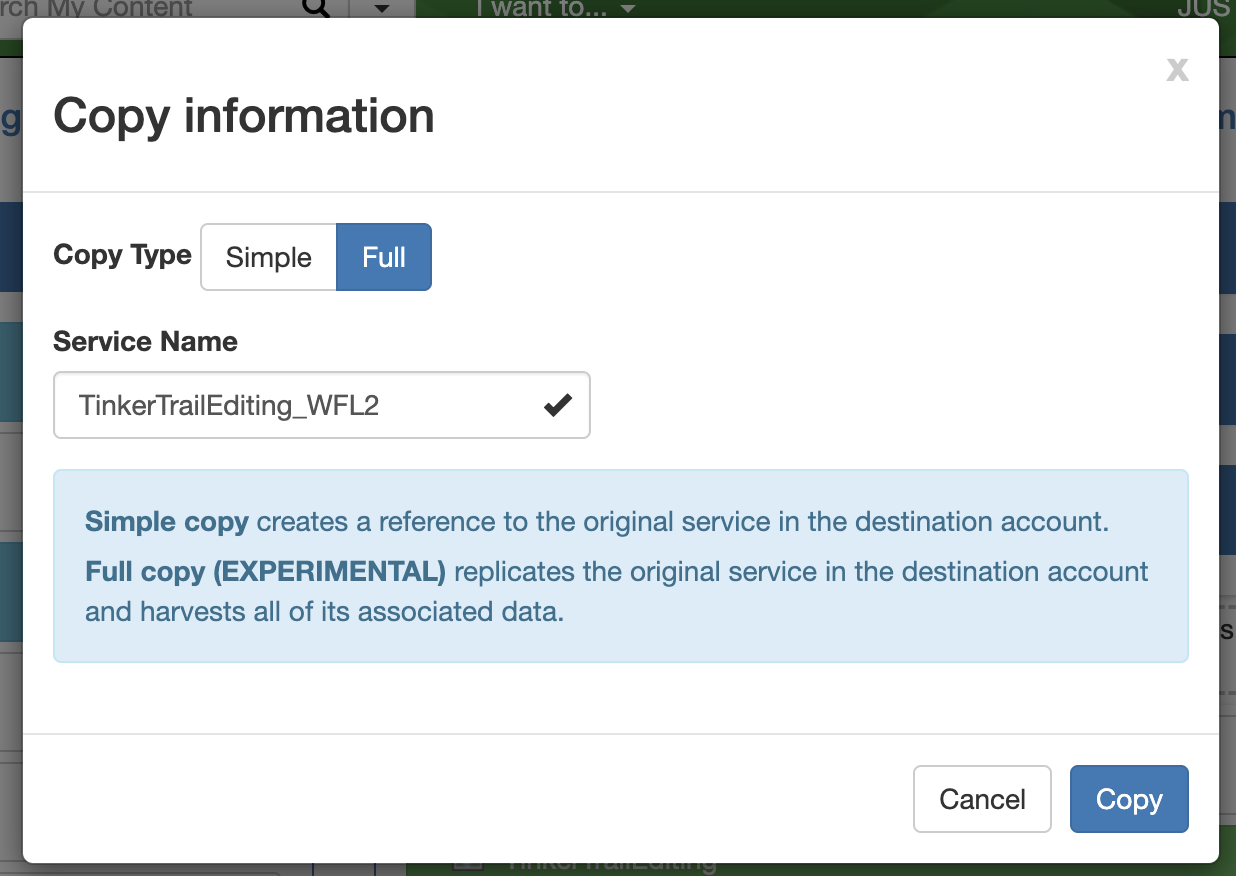
Currently, the full copy is experimental so just make sure it works. When you select it, you will be presented with the option to change the name of the service. Then it will copy and create the services.
Note: This process only copies webmaps and feature services. It cannot copy StoryMaps and Applications.
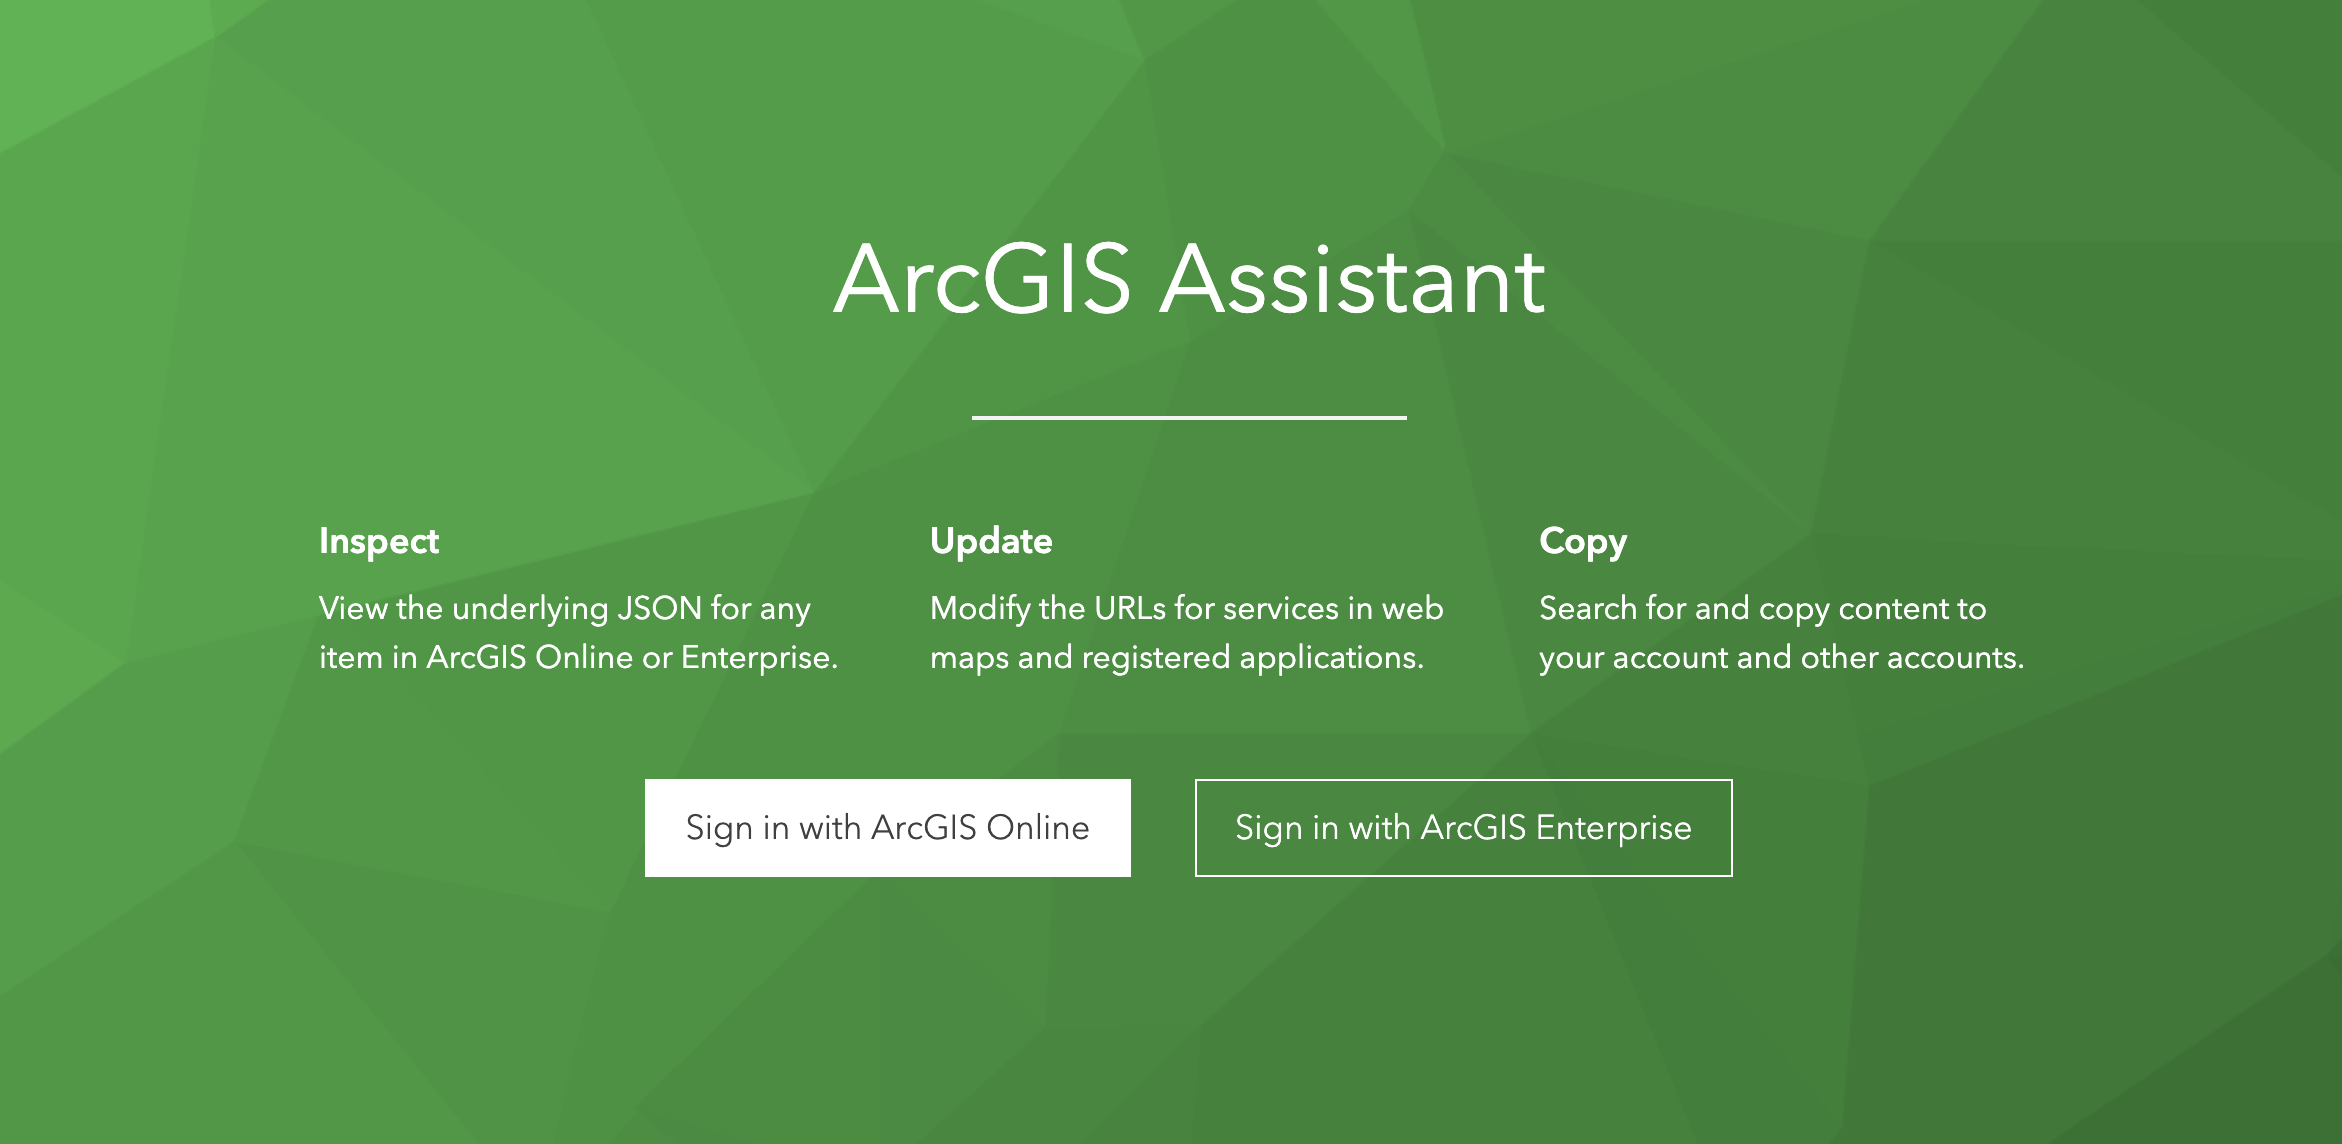
ArcGIS Online Assistant Beta
The ArcGIS Online Assistant Beta has some new and better functionality, but the process is still not ready for normal use. https://assistant.esri-ps.com/. The beta does copy over anything from ArcGIS Online, so when it finally goes into production this is by far the better tool to use.
To use the Application login with your school account.
Once you are logged in, click on your account name in the top right. This will show your active account and give you the ability to log into any other accounts you want. If you have multiple accounts besides just your personal and school account you can log in to them as well.
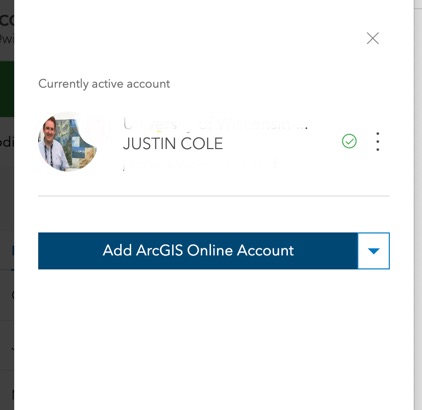
Once you are logged in make sure your school account is set to the active account. This will allow you to see all of your content.

To Copy Items click on Select what you want to copy to your other account. Then you can Click the Copy Items button. The copy process is set up like a task in ArcGIS Pro. It will first ask which organization/account the items are going to.

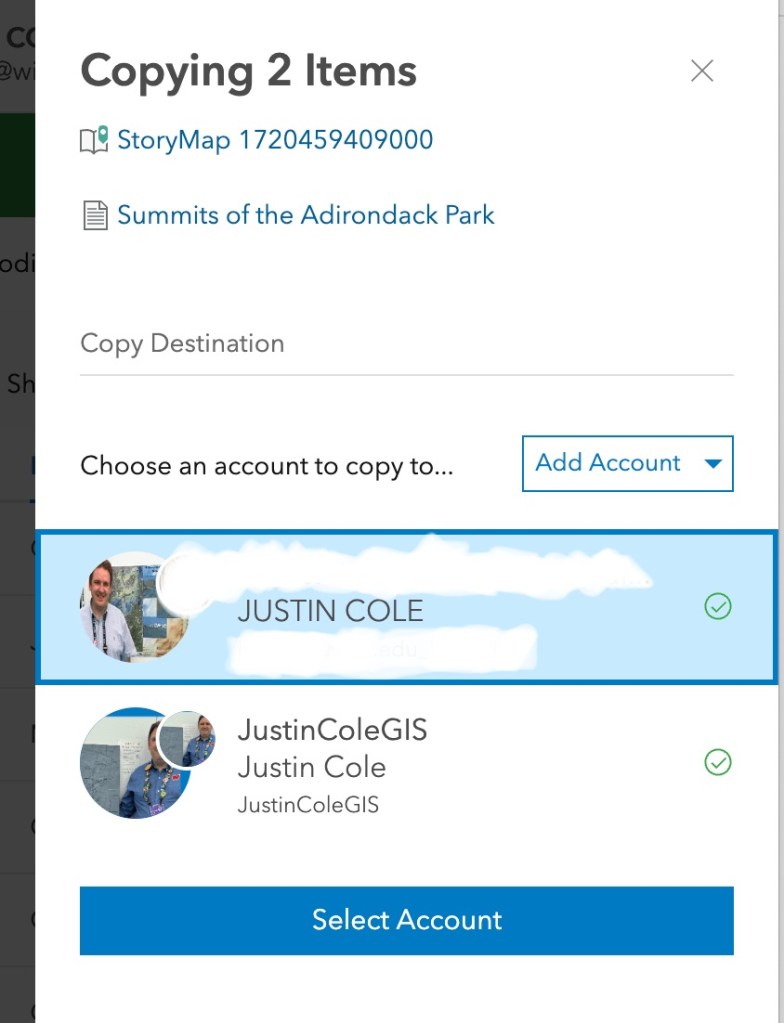
Then it will ask you to pick the user to copy the item. The interesting thing here is if you are the admin of the second organization you can pick a different user. Because your personal account is just you, only your username will appear.

Then you have the option to change the item names.
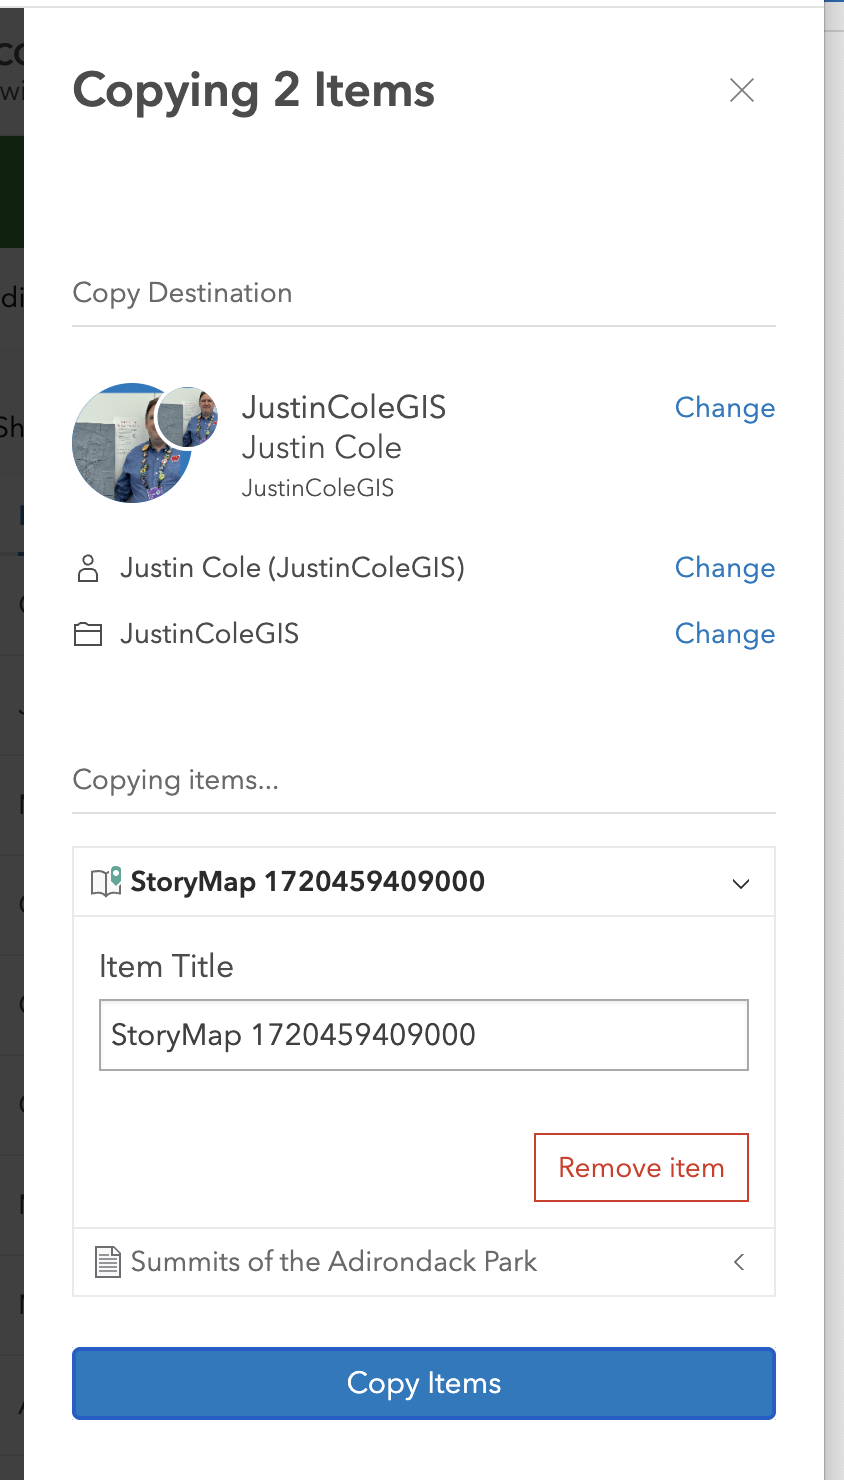
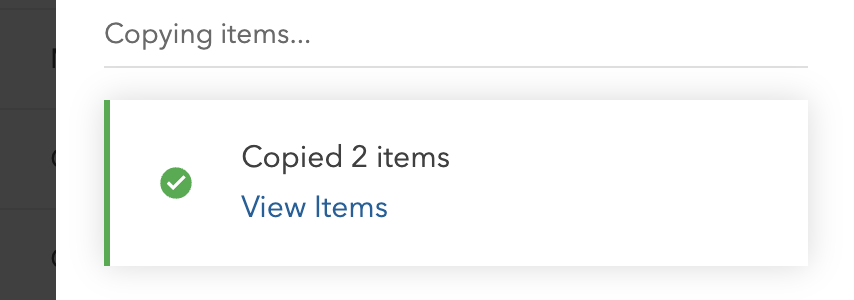
When you hit copy items here it will ask you where to place them in your folder structure as a last step. Then you can hit copy and it will copy and spin up the needed services.
Hopefully, this tutorial helps you transfer your content for your professional portfolio to share in your job search endeavors.
